Moving your design from the prototype phase to production does not have to be an uphill battle. There are some easy steps you can take to keep your product moving efficiently to production.
1. Create a Rapid Prototype Design First
No designer has the “perfect tough” in that the design is correct the first time. Even after design reviews, one does not know how the product will actually work until there is a physical model. Utilize the materials and processes in both 3D printing and cast urethane to ensure that fit, function, and the look & feel is correct.
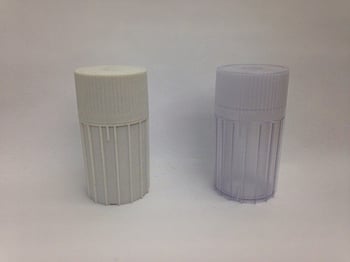
The part on the left was 3D printed to test fit and function. This helped determine the part and tool design for the production piece on the right.
2.Design for Manufacturability (DFM)Analysis
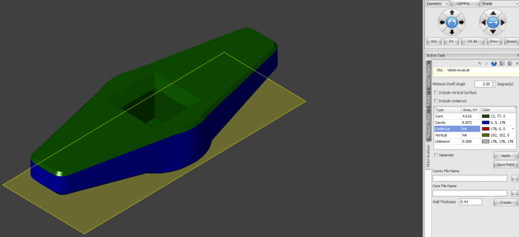
Investing in a design for manufacturability (DFM) analysis can discover potential problems. The DFM will make sure that the part design and manufacturability is correct for injection molding. Correcting any potential problems before the tool is cut can save you tool modifications that were more than likely not accounted for in the initial budget. In addition, the DFM can keep your product on track to be delivered to your customer.
3.Fully Review Initial Samples
Now that your tooling is complete, it is now time to review your initial samples (often referred to as T1 samples). But just because your initial prototypes worked, does not mean you can just glance at the tooling samples. Make sure that the samples measure within tolerance, have no cosmetic defects, and fit & function properly.


.jpg)
.png)

.png)